Showing posts with label acrylic paint. Show all posts

Friday, September 21, 2012

Burlap & Denim Wreath

So I was totally inspired by this wreath on Pinterest

Burlap and Denim Wreath


I had just cleaned out a ton of 
oh so flattering 
hideous mom jeans
from my closet 


PLUS  

I had burlap that I HAD TO BUY when I was in JoAnns.

This was the perfect time to make this wreath


Here is how I did it

Unfortunately I didnt take pics as I went but it was so easy...

Cut a long strip of burlap and wrap it around a foam wreath
(Using a glob of glue from my glue gun to anchor it) 
I just wound it around the wreath till it was fully covered.
I did a few more globs of hot glue as I went
then at the end of it too.  
I actually didn't have enough of the burlap strip cut 
to cover the whole thing 
cause I am really precise when I measure stuff
wait no I'm not
I wing it....
so I just glued the added piece to the back 
shhh, nobody will see the back anyway

Cut strips of denim to make the rosettes and create the flowers
I liked the different shades of denim too
(was wishing I still had my acid wash jeans for this--HA)

I used the tutes from these 2 sites


via-http://rebekahgough.blogspot.com


Rosette Flowers

via-http://mysparkle.blogspot.com


There are like a zillion tutorials on how to do flowers on Pinterest and YouTube
Just pick one you like, you really cant mess this up!!!


 For the "Welcome" sign I used an old cereal box 
to cut the little pennant triangles 
then used Tacky Glue to stick the denim to them 
then cut around them to make them even & neat


 I stamped "Welcome" using acrylic paint and clear rubber stamps from Michaels, they are so old, but i love them still!!

I hole punched two holes in each corner & threaded twine
I just played with it till it sat right


Here it is all finished

I totally love it
It isn't exactly like the one on 

The Magic of Ordinary Things Blog


But I am really happy with it!

Thursday, June 21, 2012

Canvas Art with Pencil Transfer Techinique & Winnie the Pooh Quote

So for a while now my Bestie has been asking me 
to make a plaque of some kind 
for her daughter's HS graduation with the adorable quote:

“If ever there is tomorrow, when we’re not

together, there is something you must always

remember. You are braver than you believe,

 stronger than you seem, and smarter than you

think, but the most important thing is, even

if we’re apart… I’ll always be with you”.

-Winnie the Pooh 


Typical procrastinator/ADD/perfectionist/staller 
that I am it took me a while 
to figure out the perfect way to do this.....

Being left to my own creative devises 
I had a color scheme, the quote 
& a pic of the dorm room comforter 


Like with any task in my life now, I started scouring through Pinterest to find inspiration

I used a pencil transfer technique 
that was so frikkin easy 
I just have to reshare and show you what i came up with


I tried a few transfer techniques out there
-wax paper;  mod podge 

But I just couldn't get it right

Then I found the newspaper transfer idea
 I changed it up a little to make my own, 
and it worked!!!!

I think I learned this somewhere along the way in 
an art class or in a scrapbooking class!  
It is not an original idea.

OK 
so, back to the project


PENCIL TRANSFER TECHNIQUE


So here is a pic of the comforter set 
Loved the vines design so we went with that


(her set is fushia/black, doesn't look it here)


First step I "colored" on the back of the pic
 with a pencil


it's tricky, tricky, tricky
(90's hip hop song reference, sorry)

Next I flipped the paper over and placed it on the canvas where i wanted the design to show up

Then using a ball point pen, pressing firmly 
to make sure the transfer of the pencil marks showed up,
 I traced the outline of the vines


see, you can see them
really difficult technique here, ha!


Then I went back with my old scrapbooking markers
(Marvy-Artist)
and colored in the vines

TA-DA!!!
Glittered Unicorns & rainbows sprouted in my craftroom!

you could easily use a sharpie
I had one on standby if Marvy didn't work!


And this is what it looked like when I was finished with it!

I think I just heard angels sing


I love it

I think it came out so cute & it was really fun to make!

Supplies:
 canvas  
acrylic paints
ribbons
ink
card stock 
pencil  
marvy pen

WOOOO HOOOOO!

Here is me & Bestie with the graduate on her special day!


Congrats, B!!!

Sunday, January 22, 2012

Very First Pinny Party!

I hosted my very first Pinny Party!

What's a Pinny Party???

It's a party where all of your Pinterest Pals 
get together & create 

If you have been obsessing about Pinterest for as long as I have,
you know you have a board of crap that you want to create!

Well, we actually did it
We had been talking about it for a while
and I finally made it happen

Here's what you can do to make your Pinny Party happen too!!

FIRST:  Pick a project

You know there are things you have that you are just dying to make
You know it maybe something with mason jars or burlap or both
and certainly glue guns are involved


Here's where we started:


We wrote up a list of supplies & sent everyone on their way to gather up all they needed
Many emails went back & forth about what supplies to get etc.
In the end we all came up with unique to us versions of the board we wanted to make.


Second: Pick a date, time & place

So we all came together on a Saturday night at my house to get our "craft on"


Third: Plan a menu

In addition to "amazing stuff I want to create" boards 
I also have "amazing stuff i want to eat & drink" boards too

I chose 2


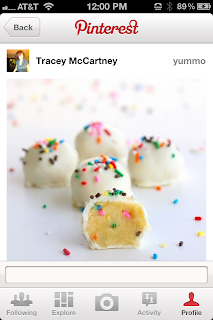
Cake Batter Truffles

found here


Strawberry Mojitos 


found here

although I was the only one who indulged in the strawberry mojitos "salad" drink
(I added way toooo many mint leaves)


Fourth:  Get your craft on

 We headed up to my craft space to get the party started


So the honest truth-
this was pretty adventurous project to make in one night
I don't think any of us finished in one sitting

With a room full of this many creative women it was great to
bounce ideas off of each other

We had a lot of laughs

We definitely wanted to pick another project and do it again


The most common phrases of the night were

"I saw it on PINTEREST"

OR

"Well if you were on PINTEREST you would have seen it"
(one of us wasn't on Pinterest at the time)


"OWWWWW"

or

"Mother f@*(!$*@, SH*t, Son of a B*tch" 
when we burned ourselves with the glue guns


More Ttuths:

This is what mine looked like at the end of the night


This is what mine still looks like


Will post pics as soon as I am done
In 6 months, I am sure!

BUT Here is K's


GORGEOUS!
She ended up using elmers glue to finish it!  LOL

Here is A's


It was an amazing night
we all had a blast

We are in the planning stages of party number 2
and I am thinking of starting a 
Pinny Party blog too!

Let me know if I have inspired you to start your own party!


Friday, February 25, 2011

Powder Room Canvas Re-Do

This canvas was purchased a few years ago from Home Goods.
Forgot to take a before pic
but it just wasn't really what I wanted in the powder room.
I wanted to add more pink/feminine in there, wanted a monogram on it but wasn't sure where I was going with this.

So I started by just painting over the canvas with browns, creams & pinks, the messier the better, there was no plan here, I just went with it.
The flourish is an old Jim Holtz-Ideology Mask which I love love love
See where the flourish kind of ends?
I messed up some how so I needed something to cover it so.....


Then I cut out my monogram w/ my cricut on cardstock & chipboard then deco'd them together to give it a little dimension and added the primitive heart (to cover the mistake),
cut from an old paperback.
The quote i stamped with ink, cut the words out & inked some more...
inky & messy is the look I love


The quote says
"together is where your heart sings loudest"
love that
not sure where i got the quote...if you know, let me know!


Added a coat of Mod Podge & it was done
I love the way it turned out!

Friday, December 31, 2010

My Attempt at Subway Art

These are my sisters' Christmas gifts-
We were trying to scale back as much as possible & only give to the kids
But they always do so much for my girls so I wanted to give them something
meaningful & unique

This is my first attemp at my own unique style of
Subway Art

I used favorite song/artists for the quotes.
We all love music so much

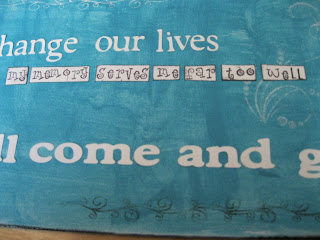
This one is George Michael's "waiting for that day"

These started out as canvases that I purchased at Michaels-3 pack for $8.00 i think?
I painted it with acrylic paint.
I dont have any organized way of doing this I just go.......
For this one I used blue & white to get the weathered look
I cut lyrics out with my cricut & stamped some too
Covered it all with a coat of Mod Podge


This one is "all you need it love" by the Beatles!


Now looking back at this, I think I would have added more words to them
But I love the way they turned out
I love the pop of red I used with the green & the blue!

Let me know what you think!